If your kitchen island or home bar is starting to feel a little tired, chances are your bar stools are part of the problem. Those seats take a beating every single day. Coffee spills, scuffed toes from dragging across the floor, sticky fingerprints from little hands, and the inevitable wear and tear that comes from being sat on, twisted on, and occasionally tipped over. But before you toss them to the curb and spend a small fortune on new ones, consider this: a simple weekend project can transform those faded, scratched, or wobbly stools into something you’ll be proud to show off. And the best part is that you don’t need to be a master woodworker to pull it off.
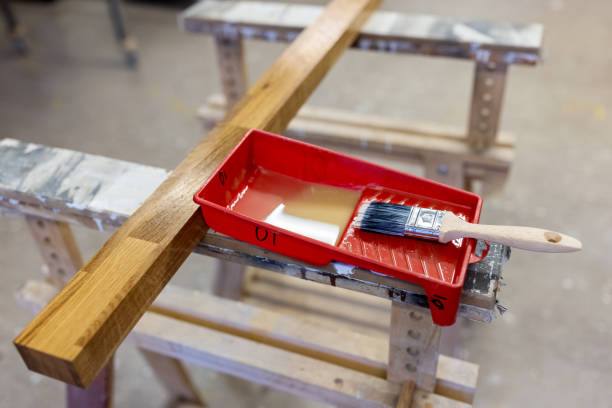
First, take a good look at what you’re working with. Most bar stools are made from solid wood, a wood veneer over MDF, or metal with a painted finish. Solid wood is the gold standard for restoration because you can sand it down and start fresh. If you’ve got veneer, you need to be more careful not to sand through the thin layer of real wood on top. Metal stools, on the other hand, often just need a coat of spray paint and maybe some new hardware. For the sake of this project, let’s assume you have a set of solid wood stools that have seen better days. That’s the most rewarding kind to bring back to life.Start by cleaning the stools thoroughly with a mild soap and water solution. You’d be surprised how much grime hides in the grain of the wood, and that gunk will ruin your sanding effort if you don’t remove it first. Let them dry completely, ideally overnight. Next, give the entire stool a good inspection. Check every joint where the legs meet the seat, the crossbars, and any rungs. If the stool wobbles, you’ll want to tighten any loose screws or apply some wood glue to loose joints and clamp them until the glue dries. There’s no point in making something look beautiful if it’s still dangerous to sit on. While you’re at it, look for deep scratches or dents. You can often lift minor dents by placing a damp cloth over them and running a hot iron over the cloth. The steam swells the wood fibers and pushes the dent back up. It works like magic more often than you’d think.Now for the messy part: sanding. This is what gives your stools a second chance. Start with a medium grit sandpaper, around 120 grit, to strip away the old finish and any surface stains. Use a random orbital sander if you have one, or a sanding block if you’re doing it by hand. Work with the grain of the wood, not against it, and be patient. Don’t try to rush through the corners and curves, they’ll need extra attention. After the first pass, wipe away the dust with a tack cloth and switch to a finer grit, like 180 or 220. This second round smooths out the scratches left by the medium grit. The goal is to get the wood feeling like silk, with no roughness at all. If you skip to a finish before the wood is buttery smooth, you’ll regret it when you feel the sandpaper texture through the stain.Once sanding is done and the stool is clean of every speck of dust, it’s time to pick your stain. This is the fun part because you get to choose the personality of your stool. Do you want a rich walnut tone that feels warm and traditional? Or maybe a dark espresso to match modern black hardware? Or perhaps you want to go light with a natural cedar look. Apply the stain with a clean rag or a foam brush, working it into the wood in long, even strokes. Let it sit for a few minutes, then wipe off the excess. The longer you leave it on, the darker the color. If it’s too light after the first coat, wait a few hours and apply a second. Don’t rush that step. A dark, blotchy stain will tell everyone you were in a hurry.After the stain has dried according to the manufacturer’s instructions, you need to protect all your hard work. A clear polyurethane finish is the standard choice for furniture that sees daily use. Choose a water-based poly for faster drying and less odor, or oil-based for a slightly more durable, amber-toned finish. Apply thin coats with a high-quality brush or a foam pad, sanding lightly with 220 grit between each coat once it’s dry. Two or three coats is usually enough for bar stools. Make sure you get the legs and any hard-to-reach spots. When you’ve applied the final coat and let it cure for at least 24 hours, your stool is ready for action.Don’t forget the hardware. If your stools have screws or bolts that are rusty or just ugly, replace them with new ones from the hardware store. A matching set of black, brass, or stainless steel fasteners can make even an old stool look like it came straight out of a catalog. And if the seat cushion is worn out, consider reupholstering it with a durable fabric that can handle spills. That’s a separate project, but it pairs beautifully with a refinished wood frame.So before you give up on those bar stools, give them some sandpaper, stain, and a little bit of patience. You’ll end up with something that not only looks better than the store-bought version but also carries the satisfaction of being built with your own two hands. That kind of pride doesn’t come in a box.