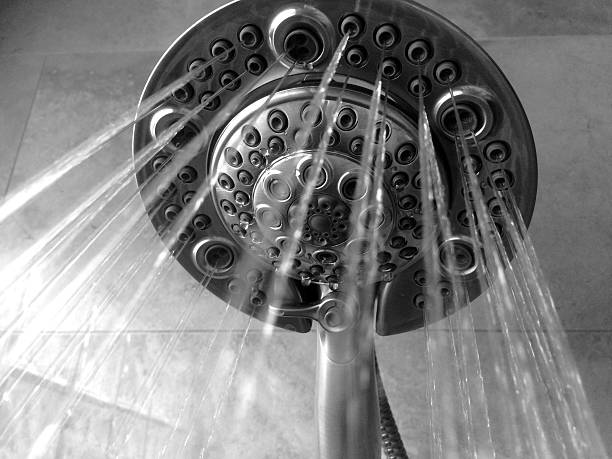
The anticipation of a rejuvenating shower under a new shower head can quickly turn to frustration when you’re met with a disappointing, weak trickle. Low water pressure in a newly installed fixture is a common but solvable problem. The issue typically stems not from your home’s main water supply, but from specific, localized factors related to the installation or the fixture itself. By methodically checking a few key areas, you can often restore a powerful, satisfying flow without the need for a professional plumber.
Begin your investigation with the shower head itself. Modern shower heads, particularly those designed for water conservation, often include a built-in flow restrictor. This small plastic or rubber disk, usually found inside the inlet where the shower head connects to the arm or inside the spray face, is mandated to conserve water but can significantly impede pressure. Carefully remove the shower head according to its design—often by hand or with an adjustable wrench protected by a cloth to prevent scratching. Inspect the inlet for a small, round disk with a tiny hole. You can often pry this out with a small flat-head screwdriver or needle-nose pliers. Removing it will immediately increase flow, though be mindful that this will increase your water usage. Additionally, submerge the shower head in a bowl of white vinegar for several hours to dissolve any mineral deposits from manufacturing or testing that might be clogging the internal channels. Use an old toothbrush to gently scrub the nozzles clean.Next, examine the shower arm, the pipe that extends from the wall to the shower head. Over time, and even during the installation of a new fixture, sediment and mineral scale can become dislodged and clog the screen inside the shower arm’s connection point. Unscrew the shower head from the arm and look inside the arm’s threaded end for a small, round screen called an aerator. If present, remove it carefully and rinse it under strong pressure, clearing any debris. Even without a screen, debris can lodge in the arm itself. To clear it, you can cover the end of the arm with your hand tightly and briefly turn the water on full force to blast out any obstruction, being cautious of the sudden release.It is also prudent to consider the broader context of your plumbing. If you have only replaced the shower head, the problem may have existed before and simply become more apparent with the new fixture. Check other faucets in your home; if the low pressure is isolated to the shower, the issue is local. If all fixtures are affected, you may have a more serious concern with your main water pressure or a partially closed main shut-off valve. For the isolated shower issue, inspect the shower’s shut-off valve, often located behind an access panel or under the sink in a nearby vanity. Ensure this valve, sometimes called an angle stop, is fully open. Valves can appear open but may be only partially turned, restricting flow significantly.Finally, reflect on the choice of shower head. Some designs, like rainfall heads with larger face diameters, inherently provide a softer, wider spray that can feel like lower pressure even with adequate flow. If you have eliminated clogs, removed restrictors, and confirmed valve positions, the perceived pressure might be a characteristic of the model. In this case, you may consider selecting a different shower head designed specifically for high-pressure performance, often featuring aeration technology or narrower, more focused jet patterns.Resolving low water pressure in a new shower head is generally a straightforward process of elimination. By focusing on the fixture itself—cleaning it, checking for restrictors, and ensuring the supply lines are clear and fully open—you can most often diagnose and remedy the issue yourself. The reward for this systematic approach is the restoration of that invigorating, powerful shower you envisioned, transforming a daily routine into a reliably refreshing experience.